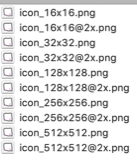
JXA では手抜きをしたけど今回はキチンと ICON を作ろう。
こんなに沢山の画像を作るなんて面倒だよ。
これも PyObjC で一つの画像からリサイズでやってしまおう。
画像のリサイズ保存方法は検索で簡単に見つかる。
しかし、Retina Display の mac では勝手に 144dpi になってしまう!
逆にそれを利用して 144dpi を作る、72dpi を自力で作る手段を探す。
なるほど、丸パクさせていただきます。
PyObjC では下記のように。
API Notes: Quartz frameworks ? PyObjC ? the Python ? Objective-C bridge
ということで。
#!/usr/bin/env python3

# make_icns.py
# This Program is Retina Display Mac Only

import os
from AppKit import *
from Quartz.CoreGraphics import *

# Preference
PNGFILE = 'icon.png'
ICONSET = 'comipoli.iconset'

src_image = NSImage.alloc().initWithContentsOfFile_(PNGFILE)
os.mkdir(ICONSET)
os.chdir(ICONSET)

def create_png(img, name):
    bmp = NSBitmapImageRep.imageRepWithData_(img.TIFFRepresentation())
    data = bmp.representationUsingType_properties_(NSBitmapImageFileTypePNG, {})
    data.writeToFile_atomically_(name, True)


for n in [512, 256, 128, 32, 16]:
    # 72dpi
    img = NSBitmapImageRep.imageRepWithData_(src_image.TIFFRepresentation()).CGImage()
    ctx = CGBitmapContextCreate(None, n, n, 8, 4 * n, CGColorSpaceCreateDeviceRGB(), kCGImageAlphaPremultipliedLast)
    CGContextDrawImage(ctx, CGRectMake(0, 0, n, n), img)
    imgref = CGBitmapContextCreateImage(ctx)
    image72dpi = NSImage.alloc().initWithCGImage_size_(imgref, (n,n))
    create_png(image72dpi, 'icon_{0}x{0}.png'.format(n))
    # 144dpi
    image144dpi = NSImage.alloc().initWithSize_(NSMakeSize(n, n))
    image144dpi.lockFocus()
    NSGraphicsContext.saveGraphicsState()
    NSGraphicsContext.currentContext().setImageInterpolation_(NSImageInterpolationHigh)
    src_image.drawInRect_(NSMakeRect(0, 0, n, n))
    NSGraphicsContext.restoreGraphicsState()
    image144dpi.unlockFocus()
    create_png(image144dpi, 'icon_{0}x{0}@2x.png'.format(n))
で。
よし使える。
実はもう app 化は完成しているんだけど。
app にすると unrar にパスを通しても unrar を認識しない問題が出た。
そりゃ app は bashrc なんて読み込みしないよな、本来 macOS には無いし。
