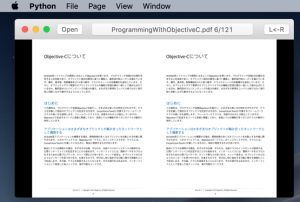
macOS 版 comipoli も PDF 対応にしたい。
NSPDFImageRep – AppKit | Apple Developer Documentation
こんなものがあったのか!
しかも NSImage からの継承。
ということは NSImage のメソッドもそのまま使えるってことだ。
elif is_pdf and re.search(r'\.pdf$', path, re.I):
    self.status = 3
    self.namelist.clear()
    data = NSData.dataWithContentsOfFile_(path)
    self.pdf = NSPDFImageRep.alloc().initWithData_(data)

######

elif self.status == 3:
    self.pdf.setCurrentPage_(num)
    return self.pdf
を前々回のソースに追記するだけで本当にイケた!
ただ cairo と Poppler の時と同じように背景は白で塗りつぶす必要があった。
しかし、画像だけの PDF だとトンデモなく表示が重いんですけど。。。。。
テキストだけの PDF なら余裕なんだけど。
筆者の mac は最新機とはいえ Air だし、pro なら。。。。。
もしかして Core Graphics を直で使ったら軽くなるかな?
と思ったので試すことに。
PyObjC の CoreGraphics は以下に入っていた
/Library/Frameworks/Python.framework/Versions/3.7/lib/python3.7/site-packages/Quartz
PDF Document Creation, Viewing, and Transforming
上記を PyObjC で簡単に使ってみる。
PATH は自前で持っている PDF に書き換えてください。
#!/usr/bin/env python3

import objc
from AppKit import *
from Quartz.CoreGraphics import *

#PATH = '/Users/sasakima-nao/Documents/ProgrammingWithObjectiveC.pdf'
PATH = '/Users/sasakima-nao/Documents/big_picture.pdf'

class ComipoliView(NSView):
    def init(self):
        objc.super(ComipoliView, self).init()
        # PDF Document
        url = NSURL.fileURLWithPath_isDirectory_(PATH, False)
        self.pdfdoc = CGPDFDocumentCreateWithURL(url)
        self.max_page = CGPDFDocumentGetNumberOfPages(self.pdfdoc)
        self.page_number = 1
        return self

    def drawRect_(self, rect):
        NSColor.blackColor().set()
        NSRectFill(rect)
        # CGContext
        ctx = NSGraphicsContext.currentContext().CGContext()
        page = CGPDFDocumentGetPage(self.pdfdoc, self.page_number)
        #
        # Draw (x1)
        #CGContextDrawPDFPage(ctx, page)
        #
        # Resize Draw
        CGContextSaveGState(ctx)
        # start
        m = CGPDFPageGetDrawingTransform(page, kCGPDFMediaBox, rect, 0, True)
        CGContextConcatCTM(ctx, m)
        # background color is white
        cgrect = CGPDFPageGetBoxRect(page, kCGPDFMediaBox)
        NSColor.whiteColor().set()
        CGContextFillRect(ctx, cgrect)
        # clip
        CGContextClipToRect(ctx, cgrect)
        CGContextDrawPDFPage(ctx, page)
        # end
        CGContextRestoreGState(ctx)

class ComipoliWindow(NSWindow):
    def init(self):
        frame = NSMakeRect(100, 400, 900, 600)
        objc.super(ComipoliWindow, self).initWithContentRect_styleMask_backing_defer_(
            frame,
            NSTitledWindowMask |
            NSClosableWindowMask |
            NSResizableWindowMask |
            NSMiniaturizableWindowMask,
            NSBackingStoreBuffered,
            False)
        self.setTitle_('draw PDF')
        self.setDelegate_(self)
        # view
        self.canvas = ComipoliView.new()
        self.canvas.setFrameSize_(frame.size)
        self.contentView().addSubview_(self.canvas)
        return self

    def nextPage(self):
        if self.canvas.max_page > self.canvas.page_number:
            self.canvas.page_number += 1
            self.canvas.display()
        if self.canvas.max_page == self.canvas.page_number:
            self.setTitle_('end')

    def windowDidResize_(self, sender):
        aw = self.contentView().frame().size.width
        ah = self.contentView().frame().size.height
        size = NSMakeSize(aw, ah)
        self.canvas.setFrameSize_(size)

class ComipoliMenu(NSMenu):
    def init(self):
        objc.super(ComipoliMenu, self).init()
        item_app  = NSMenuItem.new()
        self.addItem_(item_app)
        menu_app = NSMenu.new()
        item_app.setSubmenu_(menu_app)
        item_next = NSMenuItem.new()
        item_next.initWithTitle_action_keyEquivalent_('NextPage', 'nextPage:', 'n')
        item_next.setTarget_(self)
        menu_app.addItem_(item_next)
        item_quit = NSMenuItem.new()
        item_quit.initWithTitle_action_keyEquivalent_('Quit', 'terminate:', 'q')
        menu_app.addItem_(item_quit)
        return self

    def nextPage_(self, sender):
        NSApp.keyWindow().nextPage()

NSApplication.sharedApplication()
window = ComipoliWindow.new()
window.makeKeyAndOrderFront_(window)
NSApp.setMainMenu_(ComipoliMenu.new())
NSApp.activateIgnoringOtherApps_(True)
NSApp.run()
command+N で次ページ
って、ほとんど変わらないヤン!
結局この作業を NSPDFImageRep は内部でやっているだけなんだろう。
軽くしたきゃ cbz に変換してくれで済ませよう。
そんなことより。
PyObjC ってこんなことまでできるのかい!
書いた筆者が驚いた、Xcode マジでいらね。
